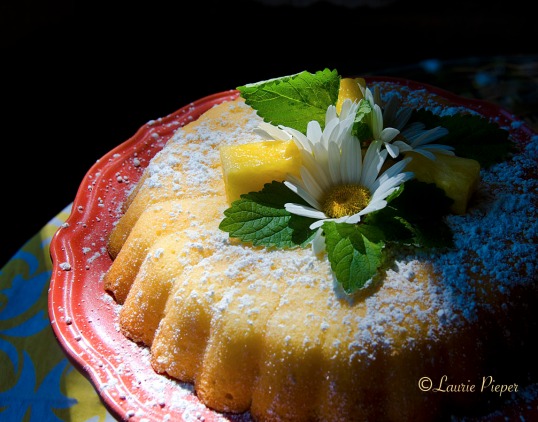
Fresh Pineapple Cake

PinappleCakeUncut

Fresh Pineapple Cake

This is a very light, moist cake with a coarse crumb that is not overly sweet. Serve for breakfast with fresh fruit and yogurt or for afternoon tea.

1 1/2 c. all-purpose flour or white rice flour (for gluten-free)

1 t. baking powder

1/4 t. salt

1 stick unsalted butter, softened

3/4 c. granulated white sugar

2 lg. eggs

1 c. buttermilk or whole milk

3/4 c. fresh pineapple cubes (between the size of raspberries and blueberries)*

confectioner’s sugar for garnish

edible flowers**, herbs, fresh pineapple for garnish, optional

1. Preheat the oven to 325 degrees F. Prepare an 8″ round cake pan or decorative cake pan with baking spray or with butter and flour. (For gluten-free, use rice flour.)

2. In a small bowl, whisk together flour, baking powder and salt. Set aside.

3. In a medium bowl, beat butter until it is light and fluffy. Add granulated sugar and continue to beat for about 5 minutes or until the mixture is light and fluffy. Scrape sides of bowl. Add eggs, one at a time, beating well after each addition. Scrape sides of bowl.

4. Lightly beat in 1/3 of flour mixture, then 1/2 c. of buttermilk or milk. Scrape sides of bowl. Repeat, and then beat in the remaining flour mixture.

5. Fold pineapple into batter. Spoon batter into the prepared cake pan, using the back of the spoon to smooth and level top of batter.

6. Bake for about 40 minutes or until a cake tester inserted into the center tests clean.

7. Cool cake in pan on a wire rack for 10 minutes. Invert cake onto cake plate to serve right away or onto wire rack to continue cooling. Dust the cake with confectioner’s sugar before serving. Garnish as desired.

* Canned pineapple tidbits can be substituted in the recipe for fresh pineapple, if well-drained first.

** Daisies and lemon balm leaves are shown here. Daisies are edible and taste similar to parsley. So they are not very dessert-like in flavor, but they are a pretty garnish.

Enjoy!
PineappleCakeSlice2

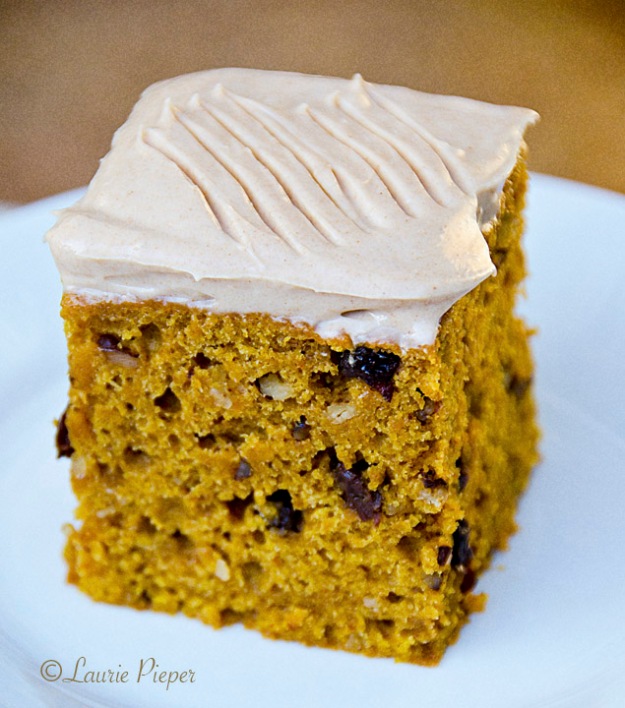
Pumpkin Snack Cake

Image

Pumpkin Snack Cake

Ingredients

2 c. all-purpose flour (stir before measuring)

1 t. baking soda

1/2 t. baking power

1 t. ground cinnamon

1/2 t. ground cloves

1/2 t. ground ginger

1/2 t. ground mace

1/2 t. ground nutmeg

15 oz. (425 gm.) canned pumpkin

3/4 c. granulated white sugar

1/2 c. brown sugar

1/3 c. canola oil

1/3 c. buttermilk

1 lg. egg

2 t. vanilla extract

1/2 c. dried currants

1/2 c. finely chopped walnuts

Cinnamon Cream Cheese Frosting (see recipe at bottom of page)
 
Directions

1. Preheat oven to 350 degrees F. Prepare a 9×9″ pan with baking spray or with butter and flour.

2. In a large bowl, whisk together flour, baking soda, baking powder, cinnamon, cloves, ginger, mace and nutmeg. Set aside.

3. In a separate bowl, stir together pumpkin, sugars, canola oil, buttermilk, egg, and vanilla until smooth and well-blended.

4. Stir pumpkin mixture into dry ingredients until smooth and no dry spots appear. Then fold in currants and walnuts. Scrape batter into prepared pan. Level top with the back of a spoon.

5. Bake for 38 – 48 minutes or until firm on top and a cake tester inserted in the middle comes out clean. Cool on a cooling rack.

6. While cake is cooling, prepare cream cheese frosting. Once cake is cooled, invert onto a cooling rack, then re-invert onto a cutting board. Frost top of cake, then cut into squares. Enjoy!


Cream Cheese Frosting

Ingredients

6 oz. cream cheese, softened

1/2 c. + 1 T. confectioner’s sugar

1 1/2 t. ground cinnamon

1 T. + 1 t. milk

1/2 t. vanilla extract

Directions

Beat ingredients together until perfectly smooth.


Searching for the Perfect Gluten-free White Butter Cake + Notes on Preparing Cake Pans

Part I.

As an innkeeper, I am aware of just how many people have food sensitivities or allergies and also of how difficult it can be for them to find foods that they can eat when they travel. This is especially the case when it comes to special events, such as  wedding receptions, where the food choices are limited.

I am working on perfecting my gluten-free white butter cake recipe which could be used for wedding cakes or baby showers. My goal, of course, is for my gluten-free cakes to be 100% as delicious as my regular wheat flour cakes. I would say that I am about 90% there with this particular cake. The flavor and crumb (cake texture) are good, but it does not quite have that melt-in-your mouth quality of my other cakes. I think that I just need to increase the butter a little on my next attempt. The two key issues to solve with gluten-free baking are (1) using the right wheat flour substitute for your recipe and (2) figuring out the right flour-fat ratio. In many recipes such as cookie recipes, a one-to-one substitution of rice flour for all-purpose flour works fine. Substitutions for specialty flours, such as cake flour, are a different story.

Normally I use cake flour for baking white butter cakes. Cake flour has a low protein content – 7.5% as compared to 10% for all-purpose flour- and weighs 3.5 oz. per sifted cup. While rice flour has an even lower protein content – 5% – it is not milled nearly as finely as cake flour. To lighten the texture of cakes made with rice flour, the flour needs to be blended with starches which are very fine in consistency. These starches also act as thickeners helping to compensate for the reduced protein content. The gluten-free cake flour blend that I made for this recipe is significantly lower in protein than cake flour – 2.5%, and is heavier weighing 4.5 oz. per double-sifted cup; but it works pretty well.

Laurie’s Gluten-free Cake Flour Blend:

Whisk together, and then sift together twice, the following ingredients.

1 c. white rice flour

1/2 c. tapioca starch

1/2 c. potato starch

1 T. Cake Enhancer (from King Arthur flour)

I used 9 oz. (by weight) of gluten-free cake flour blend as a substitute for 7 oz. cake flour in my regular white butter cake recipe. As I mentioned above, the flavor and crumb were good, but the cake didn’t have the melt in your mouth quality that really makes for a wonderful butter cake. Next time, I think that I shall increase the butter slightly. The other option would be to decrease the flour, but since the dry-wet ratio of the batter seemed right, I am going to try the increased butter option first – my theory being that the recipe needs increased fat to compensate for the increased weight of the flour.

If you have been experimenting with your own gluten-free cake recipes, I’d love to hear from you!

Image

Part II.

Proper preparation makes removing any cake from the pan easier.

(1) Place your baking pans on parchment paper and trace the outside with a pencil. Cutting just inside the pencil lines, cut paper to fit inside pans.

(2) Cut strips of parchment paper long enough to wrap around the sides of your pans, making the strips just taller than your cake pans.

(3) Butter the inside of the cake pans and one side of each of the pieces of parchment paper. Place paper, buttered side up/out in pans.

(4) Sprinkle with sifted flour or gluten-free flour. Tap pans to distribute the flour. Shake out any extra flour. (If you prefer to use baking spray, skip buttering the paper. But don’t use baking spray for gluten-free baking.) Fill with batter and bake.

(5)  After baking, allow cakes to cool then remove parchment paper from sides of pans, invert cakes, remove paper from bottoms of cakes, then re-invert.

Your cakes should turn out the pans perfectly each time.

CakePanPrep

CakeBatterInPans

BakedCakeInPan