Blood Orange Lemonade for the Season(s)

I  usually think of lemonade as a summer libation, but we have been having unseasonably warm weather and the citrus fruits at the market have been so good, that making lemonade in the middle of winter seemed like a brilliant idea. So with a bag of lemons and a bag of blood oranges in the ‘fridge, I was all set. Yum, yum! Oh, and it is so pretty.

BloodOrangeLemonade2

Blood Orange Lemonade

1 1/2 c. fresh squeezed blood orange juice

1 1/2 c. fresh squeezed lemon juice*

1 c. raw sugar (turbinado sugar)

4 c. cold water

Pour the juices into a 2-qt. glass pitcher. Combine the sugar and water in a medium size pot and heat, stirring frequently until sugar is completely dissolved. Carefully pour syrup in juice blend.* Stir. Chill until serving. Serve over ice.

*If you are worried about the relative strength or sweetness of your lemonade, you can add the syrup in stages, tasting along the way.

BloodOrangeLemonade

Cheers to you!

In season or not, we’re enjoying Blood Orange Lemonade at The Morning Star today!

Weekly Photo Challenge: Seasons.

Simple Baked Halibut

Halibut2

I love to experiment with sauces and flavors, but sometimes they can get in the way of one’s appreciation of the main element of a dish. So whenever I have a really great piece of fish – like this halibut that a friend sent to us from Alaska – I like to keep its preparation simple. That way the fish itself can really shine. Here I served the Baked Halibut with stir fried asparagus, steamed rice and soy sauce mixed with lemon juice and a dash of cayenne pepper served on the side.

Simple Baked Halibut

serves 2 – 3

1 lb piece of halibut cut about 2-inches thick, thawed

1 large lemon

sea salt

mix of black and green peppercorns

1. Preheat oven to 350 degrees F. Place a piece of parchment paper on a baking sheet.

2. Meanwhile, pat fish dry with a paper towel. Place fish, skin-side down, on the parchment paper. Lightly sprinkle fish with sea salt and several twists of fresh ground pepper. Cut about 2/3 of the lemon into thin slices. Spread slices over the top of the fish. (You can save the rest of the lemon to squeeze into a little soy sauce, if you like.)

3. Place fish in oven and bake for about 30 minutes or until cooked all of the way through. (The fish will be solid white in the center, not somewhat translucent.) Serve immediately.

Variations:

• Mix a few thin slices of red onion in with the lemon slices.

• Drizzle just a little bit of melted butter or olive oil on the fish before baking.

• Top with a little bit of chopped fresh parsley when serving.

Blueberry Mint Iced Tea

June is National Iced Tea Month … perfect timing for warm weather refreshment! Flavored iced teas are easy to make and a are a great way to add personal flair to this summertime beverage for entertaining.

Image

Blueberry Mint Iced Tea

8 c. cold water

6 bags of good black tea (decaf. ok)

3/4 c. loosely packed fresh mint leaves, washed

3/4 c. raw sugar

7 cups ice cubes

3 c. fresh blueberries (or mixture of blueberries and blackberries), washed and stemmed

Frozen blueberries and ice cubes for serving

Lemon slices for serving

Fresh mint for garnish


Directions

1. Bring water to boil in a 4-quart pot. Add tea bags, mint leaves and sugar. Cover pot and remove from heat. Allow to steep for 20 minutes. Stir to make sure that sugar is completely dissolved.

2. Place 7 c. ice cubes into a 1-gallon pitcher. Strain tea into pitcher.

3. Place berries in a food processor and pulse until puréed. Press puree through sieve into tea. Stir until ice is completely dissolved and  purée is incorporated into the tea.

4. To serve, fill glasses with ice cubes, frozen blueberries and lemon slices. Pour tea over ice. Garnish with mint.

Enjoy!

More iced tea recipes …

Black Tea “Sangria recipe.

Iced Minted Orange Juice recipe.

Mint Simple Syrup recipe for adding to iced tea.

Limoncello Sorbet

Image

Having made Limoncello recently, I have been having fun experimenting with ways to serve the liqueur. This sorbet can be served as a palate cleanser or can be incorporated into desserts or cocktails. It is simple to make, but does need to be made a day ahead in order to have time to freeze. But that means that there is still time to make it for New Year’s Day! 

This Limoncello Sorbet starts out icy, but quickly melts into a slushy consistency so that it can be sipped rather than eaten.

Ingredients

2 c. water

1 c. sugar

2 lemons

1 c. Limoncello, or to taste

Directions

1. Make a simple syrup out of water and sugar. Place water and sugar in a saucepan. Bring to a boil, stirring frequently to dissolve sugar. Once sugar is dissolved, remove from heat and stir in the juice of one lemon. Allow to cool. Stir in Limoncello. Pour into a glass container, cover tightly and freeze overnight.

2. Before serving, “fluff” sorbet with a fork and then divide between small glasses. (I used 2 oz. tequilla glasses.) Squirt each serving with a little bit of juice from the remaining lemon. Serve immediately.

Happy New Year!

The Four-Citrus Limoncello Experiment, Part II

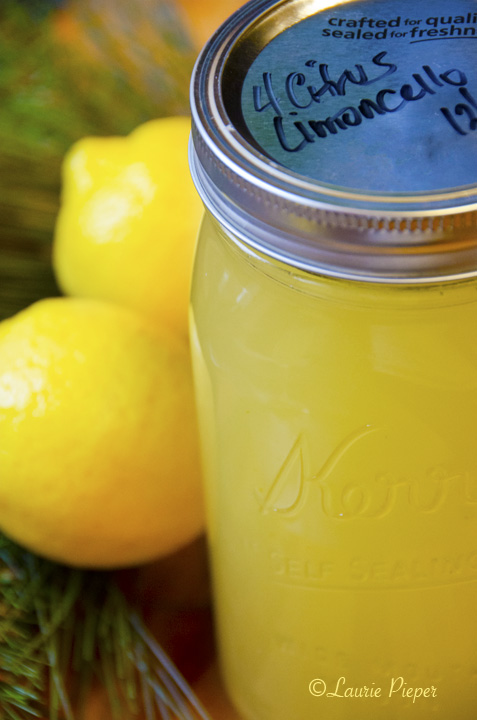
A few days ago, I posted Part I of the Four-Citrus Limoncello Experiment. As I had hoped, the method that I used – using both finely zested peels and fresh squeezed juices – allowed me create a delicious liqueur in less time than the traditional method of making Limoncello. The addition of other flavors other than lemon – grapefruit, orange, and lime – was just for fun. The recipe, posted at the bottom, makes a liqueur which is both sweet and tart, like a traditional Limoncello; and like a traditional Limoncello is slightly viscous. The flavor, however, is a bit mellower, making it very easy to sip. I was in a hurry to produce this batch because I want to use it to make a Limoncello Sorbet to serve between courses at Christmas dinner. Oh, yum, I can hardly wait!

Limoncello2

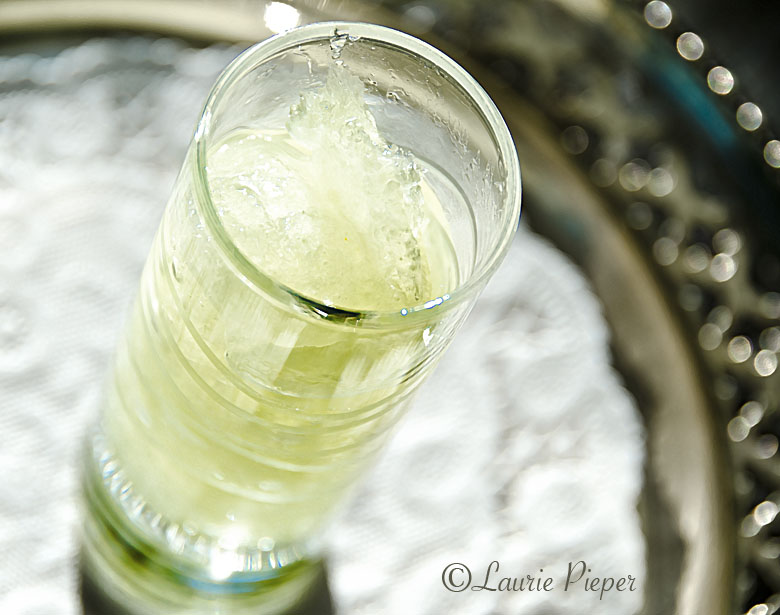
Since I used finely grated zests, rather than large pieces of peels, and also included juices from the citrus fruits, I wasn’t sure for how long I was going to have to let the liqueur infuse. When I tasted it this morning, which was 3.5 days after starting the batch, I was very happy with the results. I tried to strain it through a coffee filter, but was barely able to get enough liqueur to fill the glass that I wanted to use for photos; so I resorted to straining it several times through a very fine mesh strainer which seemed to work well.

Limoncello3

Four-Citrus Limoncello

(Makes about 1.75 quarts)

(1) Wash and dry: 

• 6 lg. lemons,

• 2 lg. oranges,

• 2 lg. limes, and

• 1/2 lg. grapefruit.

(2) Zest the fruits, removing just the colored portion of the skin, leaving the white pith behind. (Use a microplane grater to zest lemons, oranges and limes. Use a sharp paring knife to cut the zest from the grapefruit, then chop the grapefruit zest.) Combine and measure the zest from the fruits. You should have about 3/4 c. of zest, packed down.

(3) Juice the fruits and strain out the pulp out before measuring. You should have about 2 1/2 c. of juice remaining.

(4) Combine the zest and juice with:

• 2 c. granulated white sugar.

(5) Divide juice mixture evenly between two 1-quart mason jars. Top off jars with:

• 3 3/4 c. 80-proof vodka ( 1 3/4 c. + 2 T. per jar).

(6) Shake well. Place jars in a freezer. Shake jars every day and taste a spoonful of the liqueur to determine when you have achieved the desired flavor. This should be about 3 – 4 days. Strain Limoncello through a very fine strainer into clean glass container(s). Store in the freezer until serving. Salute!

Several people  kindly sent Limoncello links to me after the first post.

Giadia di Laurentiis’ recipe, which also requires just a few days.

Nostrana’s recipe, which involves suspending whole lemons above the alcohol to be infused.

Happy Holidays!

Limoncello1

The Four-Citrus Limoncello Experiment, Part I

I’ve been wanting to make Limoncello for a few weeks now, and finally made a point of doing it today. I decided to make a four citrus variation, which I have never made before. Here is the backstory. One year I decided to make a mixed-citrus marmalade for my maternal grandmother for Christmas. I purchased all of the fruits, sliced them oh so thinly and then cooked the marmalade, only to have the sugar burn just before the marmalade gelled. So, I tried it again the next day, with the same results. This was so disappointing because I had used all of that fruit and it smelled so incredibly good on the stove. So, I went to the library and did some research. I looked up every marmalade recipe I could find and it turned out that the recipe I was using – one that I had gotten out of a magazine – called for way too much water. By that point, I totally lost my interest in making marmalade for that year. But ever since, I have loved this combination of fruits and think about my grandmother whenever I use it. Hence, I decided to experiment with this combination for a limoncello variation.

Image

Most limoncello recipes direct one to add zest to alcohol, allow to macerate, strain, mix with simple syrup and then continue to age the product. I have recently come across several, however, which call for adding sugar and fruit juice at the beginning, and omitting the simple syrup at the end. Out of curiosity, I am giving this a try and am hopeful that it shall work fine.  However, I decided to hold off on sharing the recipe until I know the timing and the results for certain. I wouldn’t want you to have the experience with this limoncello that I had with the marmalade. I have read that adding juice to the recipe can make the limoncello sour – that one just wants the essential oils from the lemon peel; but so far my concotion tastes wonderful and it hasn’t even been infusing for any length of time yet. Maybe the trick will be to serve it sooner. Be patient and keep your fingers crossed for me. I’ll let you know how it turns out.

……………..

Have you made limoncello? Do you have a favorite recipe, variation, method or story to share?